

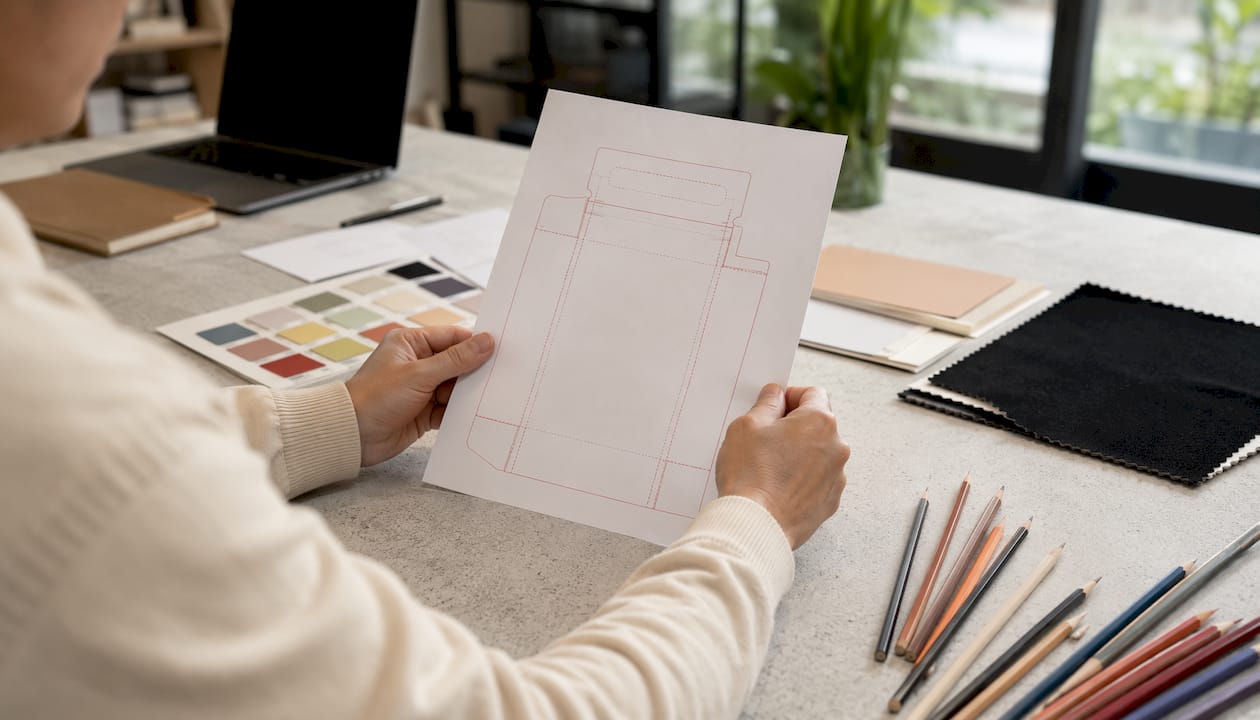
A dieline is a flat, 2D vector template that maps every cut, fold, crease, perforation, and glue tab on a printed package before a single sheet of material is touched. Think of it as the architectural blueprint for your packaging: it tells the press operator and cutting equipment exactly where to act, and it lives on a separate non-printing layer so it never appears on the finished product. Common file formats include Adobe Illustrator (.ai), PDF, and EPS.
Every dieline contains a set of core elements:
- Cut lines (solid lines): the outermost boundary where material is trimmed
- Fold/score lines (dashed lines): where the package bends or creases
- Perforation lines (dotted lines): tear points built into the structure
- Bleed area: background color extended roughly 0.125 inches beyond cut lines to prevent white edges
- Safe zone: an inner boundary keeping logos, text, and barcodes away from cut or fold edges
- Glue tabs: panels that bond the package together during assembly
Why dielines matter in printing and packaging production
A dieline is the manufacturing blueprint that keeps your packaging from falling apart, literally and figuratively. Without one, graphic elements can land on fold lines, barcodes can get trimmed off, and entire production runs can be rejected before they ship. A packaging dieline ensures every structural feature aligns with the printed artwork, so what you see on screen matches what comes off the press.
Dielines also serve as the primary communication tool between designers and print manufacturers. When your file arrives at a production facility, the dieline tells the operator’s equipment where to program cuts and folds without any guesswork. Catching a misaligned panel at the file stage costs nothing. Catching it after a full production run is a different story.
- Design accuracy: dielines confirm that artwork, text, and imagery sit in the right zones before plates are made
- Manufacturing precision: cut and fold instructions are machine-readable, reducing human error
- Error prevention: misaligned graphics, trimmed text, and failed folds are caught at the file review stage
- Clear communication: a properly labeled dieline file gives printers and manufacturers an unambiguous reference
Types of lines and marks used in dielines
Standard dielines use specific line styles and colors to communicate distinct functions, and mixing them up is one of the fastest ways to generate a production error.
- Solid lines (cut lines): indicate where the material will be physically trimmed; typically assigned a unique spot color like “CutContour” so the RIP system recognizes them
- Dashed lines (fold/score lines): mark where the substrate bends; the press operator uses these to program creasing tools
- Dotted lines (perforation lines): show where a series of small cuts creates a tear strip or opening feature
- Color coding: each line type gets its own CMYK spot color, kept entirely separate from artwork colors to prevent accidental printing
- Bleed zone: the area extending beyond the cut line where background colors must reach to avoid white slivers after trimming
- Safe zone: the inner margin, at least 0.125 inches inside fold or cut lines, where critical content must stay
- Glue tabs: clearly marked panels that will be bonded; these areas should carry minimal ink to preserve adhesive performance
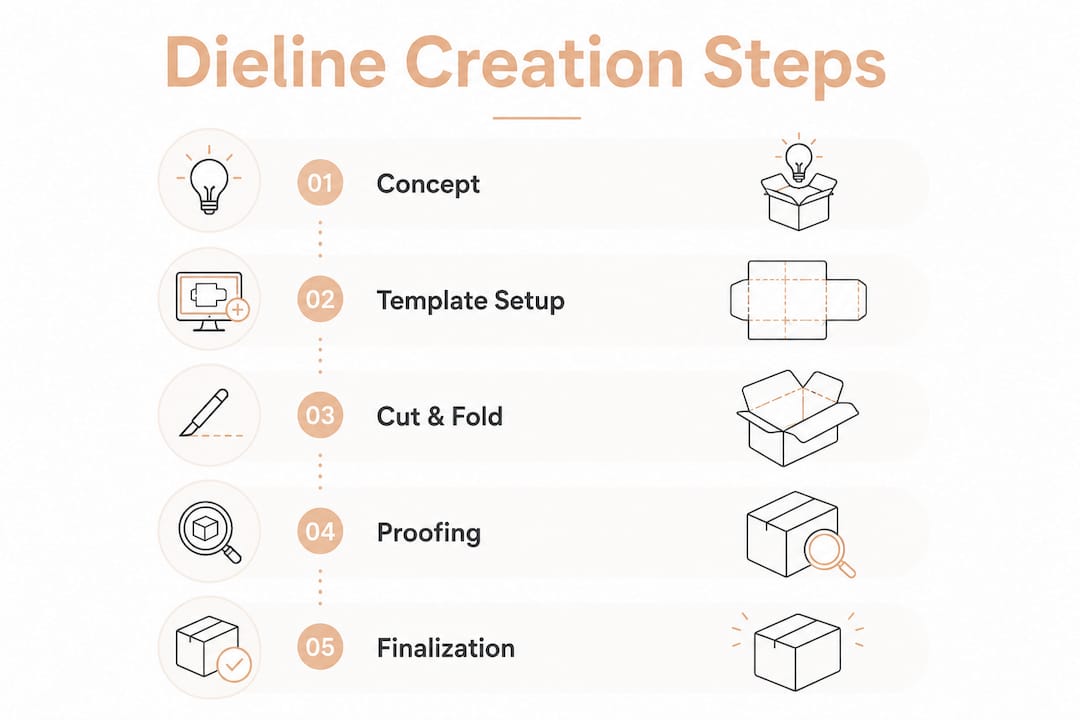
How to create a dieline for packaging and printing
-
Obtain exact dimensions or an official template. Start with your supplier’s approved template or confirmed structural dimensions. A dieline built on guessed measurements will fail at production. Impacked provides dieline support directly, so you’re never starting from scratch.
-
Open vector software and set up your document. Adobe Illustrator is the industry standard for dieline creation. Set your document to the correct dimensions and work in CMYK color mode from the start.
-
Create a dedicated, locked dieline layer. Place all cut lines, fold lines, and perforation marks on a single layer, then lock it. This prevents artwork placed on separate layers from accidentally shifting the dieline paths.
-
Draw cut lines, fold lines, and perforations with correct styles. Assign each line type its own spot color and use a minimum stroke weight of 0.25 pt. Lines thinner than that can disappear during RIP processing.
-
Add bleed and safe zone guides. Extend background colors at least 0.125 inches beyond cut lines. Keep all critical artwork, including logos and barcodes, at least 0.125 inches inside fold or cut lines.
-
Mark glue tabs clearly. Identify glue tab panels with a distinct color or label, and keep heavy ink coverage off these areas so adhesives bond properly.
-
Save in a compatible vector format. Export as .ai, PDF, or EPS. Correct line weights, colors, and vector format reduce file rejection and manufacturing delays significantly.
Pro Tip: Confirm the exact layer name and spot color name your print provider’s RIP system expects before you finalize the file. Names like “CutContour” or “Artios_Cut” are equipment-specific, and a mismatch can send your file back for revision.
Requirements and best practices for dielines
Getting the technical details right the first time saves weeks of back-and-forth with your print supplier.
- Keep critical artwork at least 0.125 inches from any cut or fold line to avoid trimming losses
- Use a minimum stroke weight of 0.25 pt for all dieline paths; thinner lines risk dropping out during processing
- Assign dieline colors as CMYK spot colors that are visually distinct from all artwork colors
- Extend background and bleed colors fully into the bleed zone to eliminate white edges after cutting
- Avoid heavy ink coverage on glue tabs; adhesives bond poorly to heavily printed surfaces
- Lock the dieline layer in your vector file to prevent accidental edits when artwork is being placed
- Validate dieline compatibility with your print supplier’s specifications before submitting the final file
Common misconceptions and what digital technology is changing
The biggest misconception about dielines is that they print on the finished package. They don’t. Dielines are non-printing layers removed before plate separation, so the press operator sees them during setup but the consumer never does.
A related confusion is between a dieline (the digital template) and a physical die (the metal cutting tool). The dieline is the file; the die is the manufactured blade that cuts the actual substrate. They work together, but they are not the same thing.
Digital die-cutting advances have made short-run packaging far more accessible by removing the need for costly metal tooling on every new shape. Brands running smaller batches, like the 500-unit minimum orders Impacked offers, benefit directly from this shift. Digital finishing means a new dieline can go from file to cut material without the traditional tooling lead time.
File naming also trips up more designers than expected. Dieline layer names vary by equipment, with labels like “CutContour” and “Artios_Cut” being equipment-specific. Using the wrong name means the RIP system won’t recognize the cutting instruction, and the file comes back for revision.
Examples of dielines across different packaging formats
Dielines look different depending on the structure they describe, but the underlying logic stays the same.
Folding cartons and boxes are among the most complex dieline formats. A standard retail box dieline includes panels for all six sides, plus glue tabs, tuck flaps, and dust flaps, all mapped flat before the board is ever scored. Impacked’s custom printed boxes use production-ready dielines to keep every panel aligned at scale.

Stand-up pouches and flexible packaging use dielines to define the seal areas, tear notches, and hang holes. The flat template accounts for how the film folds and seals under heat, which means fold lines carry real structural weight. For flexible packaging, the dieline also guides where print bleeds into the seal zone without compromising the bond.
Tubes and cylindrical packaging require a dieline that wraps around a curved surface, so the flat template must account for the circumference and overlap seam. Impacked’s packaging tubes follow this same principle, with dieline specs confirmed before artwork is placed.
Pocket folders, cold cups, and specialty formats each carry their own dieline conventions, but all share the same core: cut lines, fold lines, bleed, and safe zone, built in vector format and confirmed with the supplier before production begins.
Common mistakes to avoid when designing dielines
Most production errors trace back to a small set of avoidable file mistakes.
- Placing artwork on the dieline layer: artwork and dieline paths must stay on separate layers; mixing them causes the RIP system to misread cutting instructions
- Using raster images for the dieline: dielines must be vector paths, not pixel-based images, so they scale without distortion
- Ignoring the safe zone: text and logos placed too close to cut or fold lines will be trimmed or obscured on the finished package
- Skipping the bleed: background colors that stop at the cut line leave white edges after trimming, a common and entirely preventable flaw
- Wrong spot color names: as noted, layer and color names must match the print provider’s RIP system exactly
- Unlocked dieline layers: an unlocked layer invites accidental edits when the design team works on artwork above it
- Not confirming with the supplier: submitting a file without verifying specs against the supplier’s requirements is the single fastest way to delay production
How Impacked supports your dieline from concept to production
Getting your dieline right is the foundation of packaging that performs on shelf and in production. At Impacked, we work closely with you from the first file review through final approval, so your dieline meets production specs before a single unit is printed. Whether you’re launching a new custom box or scaling a flexible pouch line, our team handles the technical details so you can focus on the brand.
Ready to bring your packaging to life? Get a quote and let’s build something worth opening.
Key Takeaways
A dieline is the production-ready vector template that defines every cut, fold, and perforation on a package, and getting it right prevents costly manufacturing errors.
| Point | Details |
|---|---|
| Dieline definition | A flat 2D vector template mapping cut, fold, perforation, and glue tab positions for packaging production. |
| Line types matter | Solid lines cut, dashed lines fold, dotted lines perforate; each gets its own spot color to avoid confusion. |
| Bleed and safe zone | Extend backgrounds at least 0.125 inches beyond cut lines; keep critical artwork at least 0.125 inches inside fold or cut lines. |
| Digital die-cutting | Advances in digital finishing make short-run die-cutting accessible without costly metal tooling. |
| Supplier confirmation | Verify layer names, spot color names, and file format with your print provider before submitting any file. |