

An eye mark (also called an eye spot or registration mark) is a small, high-contrast rectangular area printed on flexible packaging roll stock that tells automated Form-Fill-Seal (FFS) and finishing equipment exactly where to cut, fill, fold, and seal each package from a continuous web.
Three things every designer must know before opening the dieline:
- Function: The mark is a machine-readable trigger. Without it, optical sensors on FFS lines have no reference point for cut and seal cycles.
- Placement: It lives at the web edge, typically near the bottom or on a gusset, outside the primary print area.
- First action: Confirm the sensor type on the target line before you add any mark to artwork. Some modern sensors don’t need a printed mark at all.
Detailed specs, sensor compatibility guidance, and a full prepress checklist follow below.
Table of Contents
- Why does an eye mark matter on automated packaging lines?
- Where does the eye mark sit on roll stock?
- What are the right artwork specs for an eye mark?
- Which sensor types read eye marks, and how does that affect your artwork?
- What causes sensor read failures, and how do you fix them?
- Prepress and approval checklist before the print run
- When can you skip the printed eye mark entirely?
- Key Takeaways
- How we approach eye mark specs at Impacked
- Custom packaging with eye mark specs built in from day one
Why does an eye mark matter on automated packaging lines?
Every FFS and form/finish line runs continuous roll stock through a series of stations: fill, fold, seal, and cut. The machine needs a precise, repeatable signal to synchronize those stations with each individual package repeat. The eye mark is that signal, read by a sensor mounted above or below the web.

When the mark reads correctly, registration stays tight across thousands of cycles. When it doesn’t, the consequences stack up fast: misaligned cuts, off-center seals, and unusable batches that drive scrap rates and line stoppages. Production teams treat eye mark quality as a non-negotiable engineering spec, not a design afterthought.
Pro Tip: If your line is experiencing registration errors, check eye mark size and contrast first. Those two variables account for the majority of sensor read failures before any mechanical cause is investigated.
Where does the eye mark sit on roll stock?
The eye mark lives in what converters call the eye mark area: a reserved strip along the web edge, outside the primary artwork zone. Common positions include the bottom edge of the pouch face, the side gusset panel, or a dedicated margin outside the bleed. The position is defined on the dieline and must align with the sensor’s fixed read position on the machine.
Because the mark sits at the web edge, most converters trim it off during final conversion. The finished pouch or bag the consumer sees typically carries no visible registration mark. That’s intentional. Designers should treat the eye mark as a temporary, machine-facing element and place it where it will be removed or hidden in the finished pack.
Pro Tip: Confirm with your converter whether the mark falls inside or outside the trim line before finalizing the dieline. Placing it inside the trim zone means it disappears cleanly; placing it inside the finished print area is a brand-visual problem.
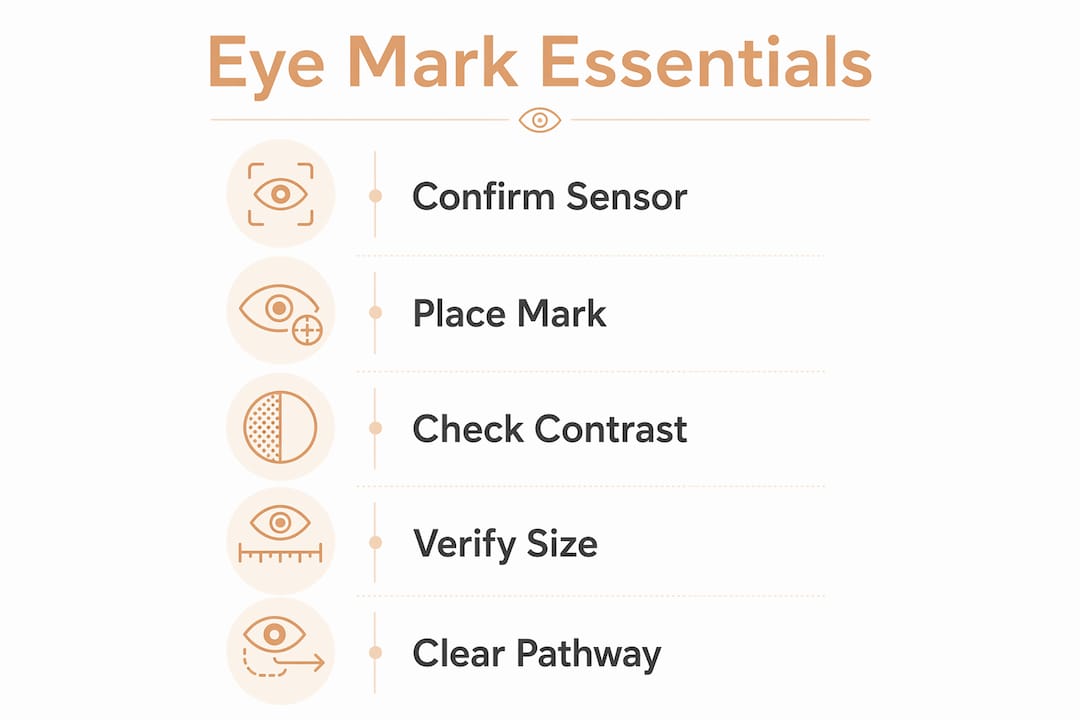
Keep the eye mark pathway completely clear of artwork, text, barcodes, and varnish. Even a small stray print element in the mark zone can confuse a sensor and cause a read failure mid-run.
What are the right artwork specs for an eye mark?
Getting the dimensions and contrast right is where most artwork errors originate. Converter guidance puts the practical target width between 2–10 mm, with a common target of ~5 mm; length should be no less than 5 mm, with 15–20 mm often used as a comfortable target. This matches practical converter and industry practitioner ranges. | Shape | Rectangular block | Solid rectangle | | Color | High contrast to substrate | Black on white or clear | | Clear zone around mark | Minimum 3 mm all sides | 5 mm preferred |

The mark must be a solid, isolated block with no gradients, halftones, or partial transparency. On clear or metallized films, black is the standard choice. On opaque white substrates, a dark solid color works, but confirm the specific color with your converter and the sensor operator before plating.
Prepress file-delivery checklist
- Place the eye mark on its own separate layer in the native file (Adobe Illustrator or equivalent), named clearly (e.g., “EYE MARK — DO NOT PRINT IN ARTWORK COLOR”).
- Assign a dedicated spot color swatch with an agreed name so the printer plates it independently.
- Include exact X/Y coordinates from the dieline origin point, not just a visual position.
- Note the required isolation zone (minimum clear area) on the dieline itself.
- Add sign-off fields for the designer, printer proof approver, and converter/FFS operator.
For dieline and file-delivery workflows, these steps prevent the mark from being merged into the artwork layer or printed in the wrong color during prepress.
Which sensor types read eye marks, and how does that affect your artwork?
Not every line uses the same detection method, and the sensor type directly determines whether you need a printed mark at all. Whether you need an eye mark depends on the applicator or FFS equipment’s sensor type: older optical sensors require a printed mark, while newer technologies may not.
- Optical/photo-eye sensors: Detect contrast between the mark and the substrate. Require a high-contrast printed mark. Most common on older and mid-range FFS lines.
- Opacity-mode sensors (e.g., MARK-EYE white-light sensors): Use a broad-spectrum white LED to detect opacity differences rather than color contrast. Can read marks on translucent, transparent, and many metallized films regardless of mark color, with auto-set routines that reduce setup time.
- Ultrasonic sensors: Detect thickness or density differences in the web. Can register package repeats without any printed mark, making them ideal for clear-film applications.
- Capacitive/thickness sensors: Similar to ultrasonic in principle; read material density changes. Also capable of eliminating the need for a printed contrast mark.
When the line uses ultrasonic or capacitive detection, printing an eye mark adds plate cost and a potential print defect without any production benefit. Confirming sensor type early can save a color separation and simplify final artwork.
Pro Tip: Before finalizing artwork, ask the FFS operator for the exact sensor model and request a digital photo showing where the sensor reads the web. That single step eliminates the most common cause of last-minute artwork revisions.
For flexible packaging formats like stand-up pouches and roll film, sensor compatibility varies by line and converter. Never assume.
What causes sensor read failures, and how do you fix them?
Registration errors on the line almost always trace back to a small set of causes. Work through this checklist before escalating:
- Low contrast: The mark color is too close to the substrate tone. Fix: switch to a higher-contrast color (typically black) and confirm with the sensor operator.
- Smearing or ghosting: Print plates or anilox settings are leaving ink spread or ghost images in the mark zone. Fix: check plate condition, ink viscosity, and whether a varnish coat is bleeding into the mark area.
- Mark misplacement: The mark position on the dieline doesn’t match the sensor’s read position on the machine. Fix: update the dieline coordinates and re-confirm with the converter before the next run.
- Dirty sensor lens: Dust, ink mist, or film debris on the sensor optic causes intermittent reads. Fix: clean the sensor lens per the manufacturer’s schedule, especially at shift changes.
- Web tension variation: Inconsistent tension causes the web to drift laterally, moving the mark out of the sensor’s read window. Fix: check unwind brake settings and rewind alignment.
- Varnish or coating over the mark: A flood varnish applied over the eye mark area reduces contrast. Fix: spot-varnish the artwork and exclude the mark zone from the varnish plate.
For packaging integrity across production runs, the recommended escalation path is: prepress team first, then the printer, then the converter, then the FFS operator. Most issues resolve at the prepress or printer stage.
Prepress and approval checklist before the print run
Run through these steps in order before approving any print run or sample sign-off:
- Confirm sensor type. Get the exact sensor model from the FFS operator or converter. Determine whether a printed mark is required.
- Verify dieline coordinates. Check that the eye mark X/Y position on the dieline matches the sensor’s read position on the machine, with tolerances documented.
- Check mark color and plate assignment. Confirm the mark is on its own spot color plate, not merged with process colors. Verify the color provides sufficient contrast on the actual substrate.
- Confirm the isolation zone. No artwork, text, barcode, or varnish within the specified clear area around the mark.
- Request a press proof or digital proof. Verify the mark prints as a solid, clean block with no halftone or gradient.
- Run a machine-acceptance sample. Ask the converter to run at least 50 pieces and confirm consistent registration over 10 consecutive repeats before approving full production.
- Confirm trim position. Verify the mark falls outside the finished pack’s visible area or within the trim zone.
- Collect sign-offs. Designer, printer proof approver, and converter/FFS operator each sign the approved proof with the eye mark position and color documented.
When can you skip the printed eye mark entirely?
Modern sensor advances have made the printed eye mark optional in a growing number of applications. Eye marks were introduced for clear-label and clear web applications where optical sensors had no other contrast reference. Opacity-mode white-light sensors now handle translucent and metallized films without relying on color contrast. Ultrasonic and capacitive sensors go further, detecting the physical structure of the web itself.
Before omitting a printed mark, take these verification steps:
- Obtain written confirmation of the exact sensor model and detection mode from the FFS operator.
- Request a sample run on the actual film specification to confirm reliable registration without a printed mark.
- Document the confirmation in the prepress sign-off record.
If sensor specs are uncertain at the time of artwork approval, include a minimally invasive mark on the initial run. A small black rectangle in the trim zone costs almost nothing to plate and eliminates the risk of a failed production run. Once the line is validated, the mark can be removed from subsequent artwork versions.
Key Takeaways
An eye mark is a machine-readable registration trigger: its size, contrast, and placement must be confirmed with the converter and FFS operator before any print run begins.
| Point | Details |
|---|---|
| Always confirm sensor type | Optical, opacity-mode, ultrasonic, and capacitive sensors have different mark requirements — confirm before artwork is finalized. |
| Keep the eye mark area clear | No artwork, text, barcodes, or varnish within the minimum isolation zone around the mark. |
| Use proven size and contrast specs | Target a small, machine-readable size that is solid black or high-contrast color, on its own spot color plate. |
| Require a sample run sign-off | Confirm with the converter that samples show consistent registration before approving full production. |
| Impacked handles eye mark specs | Impacked reviews dielines, confirms sensor compatibility, and coordinates sample run approvals as part of every custom flexible packaging project. |
How we approach eye mark specs at Impacked
One pattern we see consistently: brands arrive with beautiful artwork and a dieline that has no eye mark, or one placed in the wrong position for the target line. By the time it surfaces, the project is already at the converter. That’s an expensive place to discover a spec gap.
Our view is that eye mark placement is a production engineering decision, not a design afterthought. The sensor type, the web width, the trim position, and the repeat length all feed into where the mark goes and what it looks like. Getting that right at the dieline stage, before plates are made, is where we focus.
We work closely with clients to review dielines against their converter’s machine specs, confirm sensor compatibility, and build the sign-off checklist into the project workflow. For brands running coffee packaging, pet food pouches, or any roll-stock format, we treat the eye mark spec as part of the print-ready file, not a last-minute addition.
Custom packaging with eye mark specs built in from day one
Getting eye mark placement right the first time means fewer reprints, faster line approvals, and no last-minute artwork revisions at the converter. Impacked builds that process into every project, from initial dieline review through sample run sign-off, so your artwork arrives production-ready.

We offer custom printed flexible packaging starting at 500 units, with full dieline support, sensor compatibility checks, and a single point of contact from concept to delivery. Whether you’re running stand-up pouches, roll film, or specialty formats, we coordinate directly with your converter to confirm every spec before the press run starts.
Ready to get your packaging right from the start? Request a quote and we’ll review your dieline and eye mark requirements as part of the process.